Building a stick built house from the ground up can be an extremely rewarding and cost-effective way to get the home of your dreams. With careful planning, the right materials, and a good foundation, you can create a beautiful and durable home tailored to your needs. This comprehensive guide will walk you through the basics of stick built home construction, from start to finish.
What is Stick Built Construction?
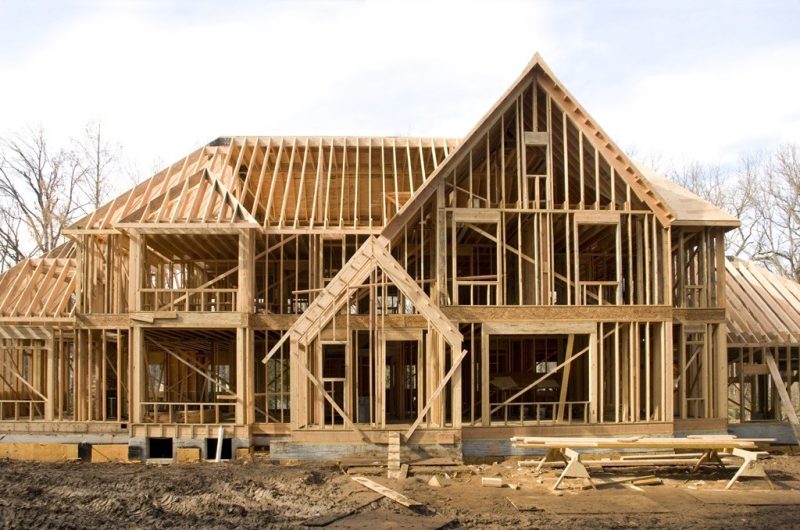
Stick built refers to a traditional method of wood frame construction for houses and buildings. It is called “stick built” because each structural element of the house is an individual “stick” or piece of wood that is nailed or screwed together to form the framework of the house.
The structural elements of a stick built house typically include:
- Studs – Vertical wood structural members that make up the wall framework. Studs are usually spaced 16 inches apart.
- Headers – Horizontal structural members that span above openings like doors and windows.
- Rafters – Sloped structural members that support the roof.
- Floor joists – Horizontal structural members that make up the floor framework.
- Sheathing – The wooden boards or plywood panels nailed to the outside of the frame to enclose the house.
- Siding – The outer layer of bricks, wood, or other exterior finish materials that protect the sheathing.
Compared to other construction methods like concrete block or insulated concrete forms, stick built house is considered more affordable, quicker to build, and easier to customize. The modular nature of the stick framing allows builders flexibility in home design and layout.
Planning Your Stick Built Home
Building a home is a massive project that requires careful planning from the very beginning. Here are some key steps to take when starting the planning process:
Determine Your Goals, Needs and Budget
Think about your priorities for the home. Consider your family size, lifestyle needs, aesthetic preferences, and budget. This will help shape decisions about size, features, materials, and design. Be realistic about how much you can afford to spend.
Select a Suitable Lot
Choose a lot that can accommodate the home you envision. Check for size, shape, terrain, vegetation, access, utilities, permit requirements, and neighborhood covenants. Consider orientation for views and sunlight exposure.
Research and Comply with Building Codes
Your local city, county and state will have building codes and zoning regulations to follow. Research these early and have your plans reviewed to ensure compliance before purchasing materials or starting work.
Choose a House Plan
You can hire an architect to design custom plans, purchase stock plans and modify them, or get inspiration online to design your own plans. Consider layout, number of bedrooms and bathrooms, storage, functionality, visual appeal, etc.
Determine Construction Method
Decide if you want to act as your own general contractor or hire a builder. Assess your DIY skills, time availability and whether any parts of the work should be left to professionals.
Organize Financing
Figure out what construction loans, mortgages, savings or other funding sources will be used. Get pre-approved and have financing lined up before you break ground.
Getting Permits and Licenses
Before starting any construction, be sure you have all required permits and licenses in place. The key ones include:
- Building permit – Approved construction plans are required. This ensures code compliance.
- Mechanical permit – Needed for HVAC, plumbing, electrical, gas and other systems.
- Construction loan – If financing through a construction loan, submit all required paperwork.
- Contractor’s license – If hiring a contractor, verify they have an active license for your state.
- Inspections – Schedule any required inspections of the lot, foundations, rough-in work, and final construction.
Failing inspections or building without permits can result in fines, tear down orders or halted construction. Do your due diligence to avoid costly delays.
Choosing a Lot and Foundation
Once financing and permits are squared away, it’s time to start construction prep. Choose an appropriate lot and get the foundation laid.
Lot Selection
Ideally the lot will be:
- Large enough for the house footprint and layout you want
- Oriented properly for views, sunlight and cooling winds
- Have usable topography that minimizes grading needs
- Located in a preferred neighborhood and school district
- Connected to public utilities like water, sewer, gas and electric
- Within your budget
Foundation Types
Foundations must be strong and stable to support the structure. Common types are:
- Concrete slab – A reinforced concrete pad poured on leveled ground as the subfloor. Easy to build but no basement.
- Crawl space – A shallow foundation with short perimeter walls and piers. Allows access under the house.
- Basement – A full basement is excavated with poured concrete walls and floor. Maximizes living space.
- Piers and posts – Raised foundation with spaced piers supporting framing posts, commonly used in flood zones.
Choose the foundation design most appropriate for your lot, budget and house style.
Hiring Excavators
Unless you own the proper equipment, hiring experienced excavation pros is advised for:
- Clearing and grading the lot
- Digging foundation footing trenches
- Excavating for basements and crawl spaces
- Operating equipment like backhoes safely
Verify licenses, insurance, equipment capabilities and reputation.
Building the Framework
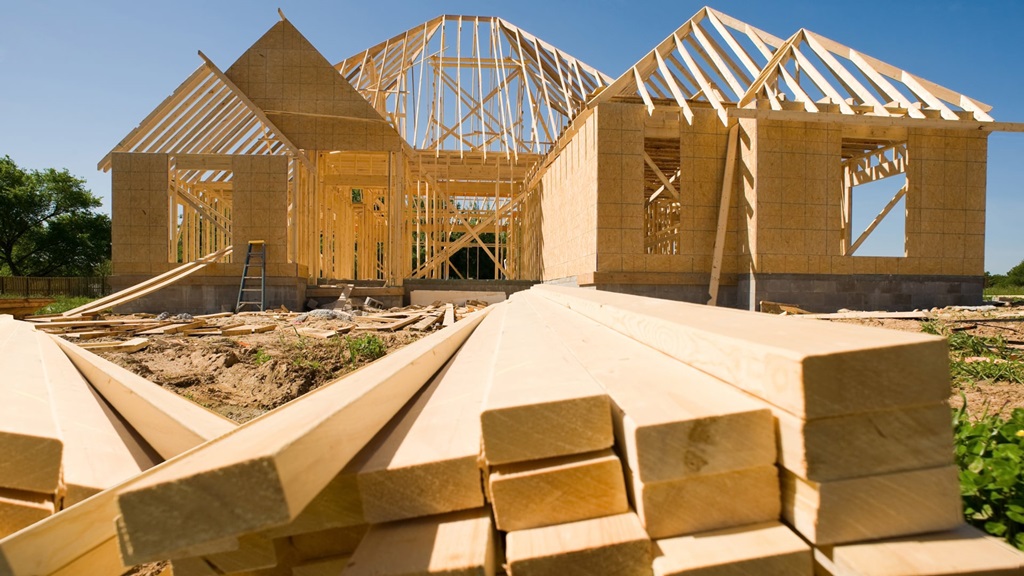
The framing or stick build phase is the structural skeleton that all other house systems get built upon. Let’s look at how it comes together.
Setting the Foundation Forms
For poured concrete foundations, forms are constructed as molds. This involves:
- Digging footer trenches around the perimeter to anchor the walls
- Building form walls from lumber and plywood
- Installing rebar grids for strength
- Securing any conduit, plumbing or electric under the slab
Forms contain the concrete until it cures into footings and walls.
Pouring the Foundation
With forms in place, a concrete truck pours the liquid concrete into the forms where it hardens. This process requires:
- Testing and ordering the concrete mix
- Scheduling truck deliveries
- Monitoring pour amounts and timing
- Preventing overfills or voids
- Finishing and smoothing the slab surface
Let the foundation fully cure before moving on.
Framing the Walls
The stick framing begins by assembling each exterior wall flat on the decking:
- Bottom wall plates get anchored to the foundation
- Studs are toenailed into plates at 16″ intervals
- Headers go above any openings
- Window and door rough openings get framed
- Diagonal bracing is added for shear strength
- Top plates tie everything together
Insulation can be added between studs now or later.
Raising the Walls
Once assembled, the walls must be tilted up and joined at the corners. This requires:
- Organizing wall sections logically for raising order
- Having helpers properly lift and temporary brace walls
- Ensuring corners and ends are perfectly aligned
- Nailing, gussetting and hurricane clipping for strength
Take precautions against walls falling inward or racking out of plumb.
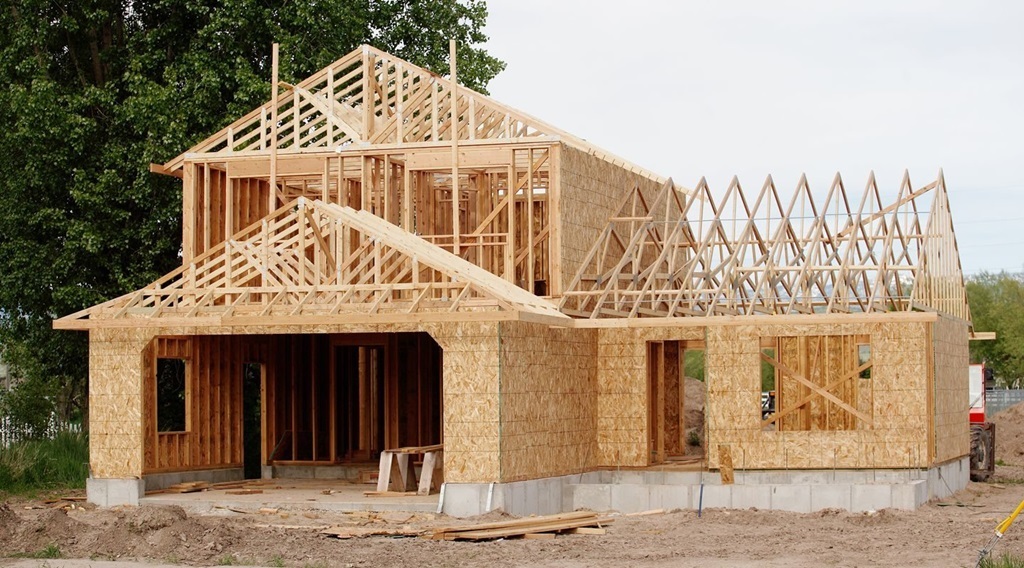
Framing the Roof
The roof framing comes next, built in place atop the walls:
- Top wall plates are tied into the roof structure
- Rafters are notched and secured to ridge boards
- Collar ties join rafter pairs near the ridge
- Trusses can also be integrated and craned into place
Keep rafter lengths and angles consistent for even roof planes.
Adding Sheathing
Sheathing covers the frame and creates the structure’s “skin”:
- Use plywood or OSB panels for walls and roof
- Nail in a sequence to prevent buckling
- Allow 3/8″ gap between sheet edges
- Overlap seams on corners and stagger patterns
- Cut openings for windows and doors
- Seal sheathing fully against moisture
Quality sheathing prevents leaks, warping and drafts.
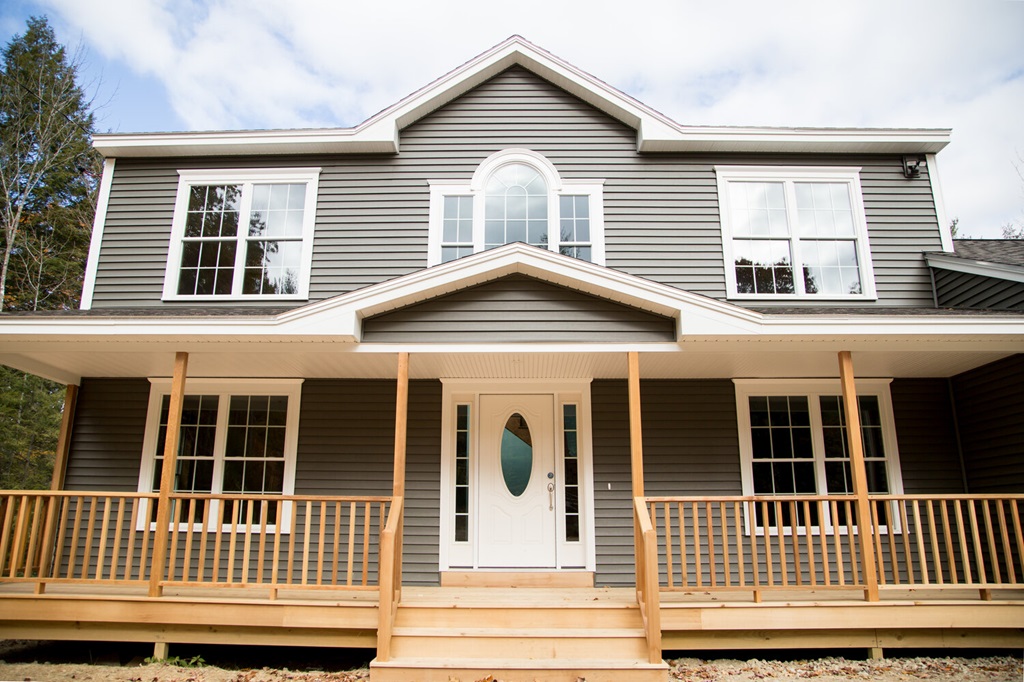
Completing the Exterior
Now that the structure is together, it’s time to focus on exterior finishes.
House Wrap and Flashing
Before siding goes on, the house gets wrapped with:
- Synthetic weather barrier like Tyvek
- Flashing tape at joints and openings
- Seam tape at all overlaps and edges
This underneath layer adds a waterproof shield.
Installing Windows and Doors
With rough openings prepared, it’s time to install:
- Exterior doors first, shimmed and anchored securely into jambs
- Windows next, also shimmed level and plumb
- Flexible caulking around frames for air sealing
- Insulation packed into gaps
Protect installed units during ongoing construction.
Hanging Siding
Popular siding options each have their own install method:
- Wood or fiber cement boards get nailed at stud locations
- Vinyl siding uses a snap fit and expanding foam in the channels
- Brick or stone veneer requires a mortared concrete backing
- Stucco uses wire lath nailed over water barrier and applied scratch coat
Follow manufacturer instructions carefully for best results.
Building Decks and Porches
Decking expands living areas outdoors. Build steps as follows:
- Pour concrete piers beneath beams and posts
- Anchor beams and secure post bases
- Install floor joists across beams for support
- Add decking planks, stairs, railings and trim
Follow codes for decking span limits, footing depths, railing height and stair dimensions.
Installing Roofing
Protecting the interior from the elements depends on a sound, watertight roof.
Roofing Materials
Popular options include:
- Asphalt shingles – affordable and easy to install
- Metal roofing – long-lasting but higher upfront cost
- Clay or concrete tile – durable but very heavy
- Slate or wood shakes – expensive but beautiful
Choose climate-appropriate materials that suit your budget.
Underlayments and Flashings
Before shingles go on:
- Apply roofing felt for a protective barrier
- Install drip edge flashing along the roof perimeter
- Place flashing around vents, valleys, joints or changes in roof plane
Proper underlayment prevents leaks and moisture damage.
Shingle Installation
Asphalt shingles are a common DIY choice:
- Start at the bottom edge, building courses upward
- Offset seams between rows in a bricklike pattern
- Nail carefully to avoid cracking shingles
- Use ridge vents or caps along the peak
- Observe all safety precautions when working on roofs
Take your time to produce neat, orderly courses for a professional result.
Roughing In Mechanicals
Inside the framed structure, the rough stage readies the house for finishing touches.
Running Ductwork
A home’s HVAC system regulating temperature and airflow depends on well-planned ducts:
- Main trunk lines extend from the unit to vents
- Branch lines split off to reach specific rooms
- Use sheet metal ducts, flex ducts, registers and grilles
- Seal all joints thoroughly with mastic to prevent leaks
- Insulate ducts that run through unheated spaces
Proper sizing and routing keeps airflow balanced.
Plumbing Pipes and Vents
A complete plumbing system requires:
- Main water supply line routed into the house
- Water lines, drain lines and vent stacks installed
- Shut-off valves placed for water appliances
- Drain/waste lines sloped 1/4″ per foot
- PEX for flexibility or copper for durability
- Proper support brackets and hangers
Plan efficient pipe routes and avoid using joints inside finished walls.
Electrical and Lighting
Consult electricians as needed for:
- Installing the main service panel and meter
- Running wire circuits to wire boxes and fixtures
- Using proper wire gauges for intended loads
- Using staples, cable clamps and junction boxes
- Including circuits for phone, cable, data, alarms, etc.
- Setting recessed lights into ceilings
Follow all relevant building codes closely for safety.
Installing Insulation
Proper insulation makes homes more comfortable, efficient and economical.
Materials and Types
Common options suited to different applications:
- Fiberglass batts – Inexpensive for walls and ceilings
- Blown-in cellulose – Easily fills odd-shaped cavities
- Rigid foam – Adds insulation value and sheathing
- Spray foam – Seals gaps and custom fits irregular areas
Use faced batts in cooler climates and unfaced in warmer ones.
Recommended R-Values
Insulate to the recommended R-value levels based on your climate:
- Walls: R-13 to R-23
- Ceilings: R-30 to R-60
- Floors: R-13 to R-30
Higher R-values equal better heat retention in winter and cooling in summer.
Installation Tips
Follow guidelines to get insulation right:
- Air seal gaps first before insulating
- Use correct protection and safety gear
- Cut batts for a snug, seamless fit
- Keep insulation away from heat sources
- Ensure equal coverage on all exterior walls
- Don’t compress – let insulation fully loft
Installed correctly, insulation will serve the home well for decades.
Hanging Drywall
Drywall construction finishes the interior surfaces throughout the home.
Drywall Basics
The panels consist of:
- Gypsum core layered between paper facers
- Standard sizes of 4 x 8, 4 x 10, or 4 x 12 feet
- Thicknesses of 1/2″ or 5/8″
The panels get cut to required sizes and hung on walls and ceilings.
Installing on Walls
Drywall hangers begin after insulation is in place:
- Use self-tapping drywall screws to affix panels to studs
- Position straight panels perpendicular to framing
- Stagger vertical seams between panels
- Leave 1/4″ gap for expansion at ceilings and floors
- Cut outs around outlets, vents, pipes, etc.
Work top to bottom, left to right.
Installing on Ceilings
Ceilings require a different approach:
- Use longer screws for angled overhead installation
- Work in rows, positioning panels across framing
- Use temporary wood braces or drywall lift to hold panels overhead
- Cut panels to fit around lights, vents and openings
- Stagger end seams in bricklike pattern
Take safety precautions when working on ladders or lifts.
Finishing Drywall
Preparing it for paint or texture involves:
- Taping joints with mesh and drywall compound
- Applying multiple thin coats of compound
- Sanding between coats for smooth finish
- Filling any cracks, holes and imperfections
- Carefully sanding corners and around windows
Proper drywall finishing prevents cracks and visibility of seams down the road.
Flooring Installation
Flooring options range from economical to luxurious. Determine the best choices for your budget and lifestyle.
Carpet
Broadloom carpet involves:
- Removing any existing flooring
- Repairing or replacing damaged subfloor
- Adding underlayment padding
- Trimming and sealing carpet edges at walls
- Stretching carpet over tack strips for smooth seams
Carpet lasts longer with regular vacuuming and professional cleaning.
Vinyl and Linoleum
Resilient sheet goods require:
- A smooth, clean substrate
- Perimeter sealant to buffer against expansion
- Seam filler between sheet edges
- Weights or seam roller to bind pieces
- Moldings and trim for finished appearance
Waxing protects the surface from scuffs and stains.
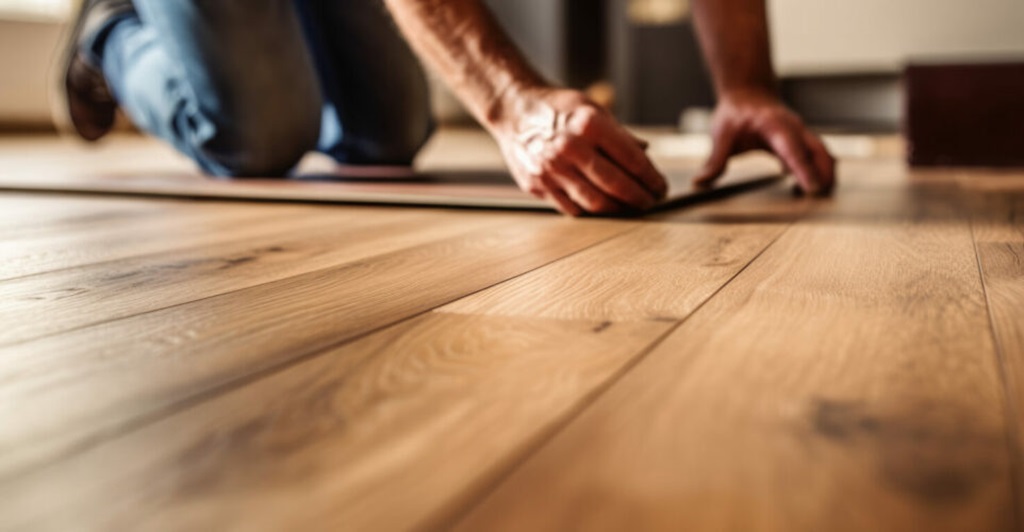
Wood Flooring
Hardwoods can be site-finished or prefinished:
- Nail tongue and groove strips over substrate
- Follow flooring direction for strongest installation
- Leave 1/2″ gap at walls for expansion
- Sand and finish site-finished floors
- Use trim molding at flooring borders
Refinishing brings back wood floor’s luster through the years.
Tile and Stone
Ceramic, porcelain or natural stone tiles need:
- Cement, mortar or acrylic substrates
- Properly spaced layout lines
- Mixed thinset mortar for setting tile
- Grouting and sealing after grout dries
- Expansion joints to prevent cracks
Grout requires regular sealing to prevent stains.
Cabinet and Countertop Installation
The right kitchen and bath cabinetry provides both form and essential function.
Hanging Cabinets
Kitchen workflow improves with a logical layout:
- Mark stud locations on the wall for mounting
- Establish accurate level baselines for tops and bottoms
- Provide strong support using ledger boards or brackets
- Drill holes for plumbing or wiring passages
- Use shims to level and screws to anchor firmly
Start with corner cabinets and work outward.
Installing Countertops
Common material options include:
- Laminate – Affordable with many color choices
- Solid surface – Seamless with molded edges
- Granite – Elegant and durable but requires sealing
- Quartz – Low-maintenance with modern look
Follow the manufacturer’s home instructions for the best results with each material type.
Painting and Caulking

Paint and caulk provide protective and aesthetic finishes.
Interior Painting
- Fill any drywall imperfections with joint compound and re-sand
- Wipe away dust and wash walls prior to priming
- Apply oil-based primer to stained areas
- Use latex primer for standard prep
- Cut in edges with brush, then roll paint in sections
- Allow proper drying time between coats
- Remove outlets and switch plates to paint behind them
- Use drop cloths and tape for neater paint lines
Proper prep prevents future paint flaws.
Exterior Painting
- Check weather forecast – avoid painting in direct sun
- Pressure wash siding to remove chalk and dirt
- Cover shrubs and landscaping with plastic
- Use extension poles to reach high areas
- Prime raw wood, brick, or other bare materials first
- Caulk gaps and seams for smoother finish
- Follow proper surface prep and application for paint type
Sealing the exterior protects from moisture damage.
Caulking and Sealing
- Use interior caulk around trim, corners, and joints
- Apply exterior caulk around windows, doors, and openings
- Use clear silicone for wet areas like tubs and sinks
- Cut tip at 45 degree angle for optimal bead
- Smooth the bead immediately after applying
- Caulk takes 24 hours to fully cure
Adequate caulking prevents air leaks and water intrusion.
Completing Mechanicals
The finishing touches involve interior fixtures and hooking up appliances.
Installing Fixtures
- Set bathroom vanities, toilets, tubs, and showers
- Add bathroom accessories like towel bars and mirrors
- Install interior doors and hardware
- Mount light fixtures and ceiling fans
- Attach kitchen accessories like pot racks and backsplashes
Hire electricians for any complex electrical work.
HVAC Startup
An HVAC pro will:
- Test ductwork for leaks under pressure
- Check refrigerant charge and airflow
- Verify combustion if gas furnace
- Program thermostat and test heating/cooling
- Review maintenance needs with homeowner
Proper startup extends the system’s service life.
Final Plumbing
The plumber finishes:
- Installing supply valves and drain connections
- Anchoring tub/shower units
- Sealing toilet bases
- Checking for leaks
- Flushing to remove sediment
Confirm all fixtures are functioning properly.
Schedule Final Inspections
Before occupancy, the home must pass final inspections:
- Building inspection – Checks that construction matches approved plans. Ensures structural soundness and code compliance.
- Mechanical inspection – Examines HVAC, electrical, plumbing, and other systems for proper function, safety and code adherence.
- Fire inspection – Verifies proper fire separation between units, firewall assembly, egress requirements, fire extinguishers, alarm systems if required.
Only proceed with move-in once the home has passed all required final inspections and received an occupancy permit.
Care and Maintenance
A well-stick built hose requires ongoing care and maintenance to remain safe, comfortable and structurally sound.
Recommended Homeowner Maintenance
- Inspect roof annually and replace damaged shingles
- Check and reseal windows, doors, siding as needed
- Repaint exterior surfaces when paint starts cracking or peeling
- Replace worn weatherstripping and caulking around windows and doors
- Clean gutters and downspouts to prevent flooding
- Monitor for leaks, moisture or cracks and repair immediately
Preventative maintenance saves money over the long run.
HVAC Maintenance
- Replace air filters monthly for optimal performance
- Have a professional clean and inspect the system annually
- Clear debris and vegetation away from outdoor condenser units
- Arrange seasonal startup and shutdown by a technician
Proper HVAC maintenance improves indoor air quality and system longevity.
Landscape Upkeep
- Prune trees/shrubbery away from siding and rooflines
- Maintain grading around foundation for proper drainage
- Keep plants, mulch and soil 6″ back from siding
- Remove wood piles and other combustibles from exterior walls
Managed vegetation protects the home.
Conclusion
Building your own stick built house is an immensely gratifying experience that lets you customize your living space as desired. With careful planning regarding design, budget, material selection and hiring qualified professionals, you can create an enduring home crafted to your needs. Patience and persistence through the construction process will reward you in the end with a beautiful, high-quality home built to last. Maintain your investment through vigilant care and maintenance, and your stick built house will provide security, sanctuary and joy for many years to come.
Frequently Asked Questions
Q: What size house can be built with stick built construction?
A: Stick built homes can range tremendously in size from under 1,000 square feet to over 10,000 square feet. The modular framework of walls, floors, and roof assembled from individual lumber pieces allows for very flexible dimensions.
Q: Is stick built or prefab construction better?
A: They both have pros and cons. Prefab uses assembly line efficiency but allows less customization. Stick built takes more effort on-site but offers more flexibility. Quality depends more on the builder than construction method.
Q: How much does it cost per square foot to build a stick built house?
A: Average cost is around $100-$200 per square foot depending on features and location. High-end custom homes cost $200-$500 per square foot. Simple designs under 2,000 square feet can cost as little as $50-$100 per square foot.
Q: Is stick built house cheaper than concrete block?
A: Generally, yes. Wood framing for walls is faster and cheaper than building forms and pouring concrete. But concrete adds thermal mass, fire resistance, and sound dampening. Overall costs depend on many factors.
Q: Should insulation go inside or outside the house wrap?
A: Insulation should be installed on the interior, toward the heated/cooled side of the wall assembly. The weather barrier house wrap goes on the exterior side and blocks drafts, moisture, and air infiltration. The two materials serve different purposes.